 This
is the Raven's Bridge spread with the classic Gumppenberg Tarot of 1835.
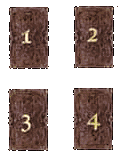
1 = The call |
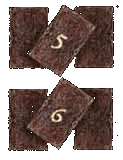
5 = The bridge for the call |
![]()
As said, the 'Raven's Bridge' seems to be most attractive to people,
maybe just because it is pretty simple in its structure. It is useful for
situations in which you want to achieve or get something.
A little more about the seven cards:
Card 1 is the call - it is what you ask for, what you call for, what you want
and expect.
Card 2 is the answer you'll get.
Card 3 is the seed - means that is what you actually do to achieve something,
your active input.
Card 4 is the result you'll achieve.
When the cards are laid out, the comparison between card 1 and card 3 can be
quite significant - as the comparison between card 2 and card 4.
The cards 5 and 6 are quite flexible in their usage:
Card 5 is the 'bridge' for your call - it shows up what possibilities your call
and its echo will open up for you. It also shows what chances are provided or -
in case the echo to your call is 'negative' - are left. It is a 'bridge' - a
bridge that you can use the best way you need it. If your call needs a bridge,
use it for it. If your call was answered perfectly well, take it as a bridge to
a proceeding or further improvement. If your call was poor and received the
appropriate echo, take it as a bridge to an improvement of your own sweet
self..
Same applies for card 6, which is the bridge for your seed and its harvest.
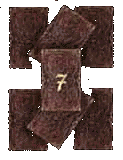
Card 7 finally is the other side of the bridge - the future point where you
will land. If this card happens to be a 'bad' one although all those before
were 'good', you should fairly think about the whole endeavour once again.
If this card comes out being a 'good' one although all the cards before were
lousy, don't forget that all's well that ends well, when the result is worth
the effort.
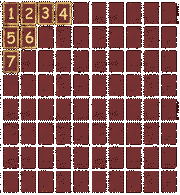 |
When using the '2-birds-system', the position of the
seven cards are like in the model aside. |
Now you can display your cards here.
As you see, the cards in the Shuffle Window have their numbers on their backs,
so it is easy to choose the right ones from the dropdown lists. Just take care
you have them in the right order.
|
The other side
|
